
Hi again from Emma. I’ve been busy as heck because summer is coming to a close (Please say it isn’t so!) and I’m trying to pack in as much outside time as I can before our Midwest winter hits. One of the things I’ve been doing is making tomato powder from the skins I remove before canning my tomatoes.
Royal Blue Velvet Cake
This recipe has been around for a while but I was a little surprised that so many of my friends hadn’t heard of it. You’ll impress your family and friends with this one! I believe the original recipe came from the Betty Crocker Kitchen.
Royal Blue Velvet Cake
Prep Time 30 Minutes
Total Time 1:35 Hr:Mins
For the Cake:
1 box Betty Crocker® SuperMoist® white cake mix
1 1/4 cups buttermilk
1/3 cup vegetable oil
3 eggs
1 tablespoon unsweetened baking cocoa
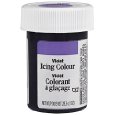
2 teaspoons royal blue paste food color
1 toothpickful violet paste food color (be sure to get the paste food coloring)
For the Frosting:
1 jar (7 oz) marshmallow creme
1 cup butter or margarine, softened
2 1/2 cups powdered sugar
1/8 teaspoon salt
- Heat oven to 325°F. Grease bottom and sides of three 8-inch round cake pans with shortening and lightly flour, or spray with baking spray with flour.
- In large bowl, beat all cake ingredients with electric mixer on low speed about 30 seconds or until moistened. Beat on medium speed 2 minutes, scraping bowl occasionally.
- Divide batter evenly among pans. Bake 23 to 28 minutes or until top springs back when lightly touched in center. Cool 15 minutes. Remove from pans; cool completely.
- In large microwavable bowl, microwave marshmallow creme uncovered on High 15 to 20 seconds to soften. Add butter. Beat with electric mixer on medium speed until smooth. Beat in powdered sugar and salt until smooth.
- If necessary, trim rounded tops of two cake layers to flatten before assembling. Place 1 cake layer, top side down, on serving plate; spread with about 1/3 cup frosting. Top with second layer, top side down; spread with about 1/3 cup frosting. Top with untrimmed cake layer, top side up. Frost side and top of cake with remaining frosting.

Seed Savers’ Glossary of Terms
One of the most prudent things a gardener can learn is how to save seeds from one season to use the next. Growing your garden from seeds you’ve gathered and saved moves you to the next level of sustainability. And the vegetables and herbs you grow from the seeds you’ve saved just seem to taste better! I find it almost magical to watch plants sprout from seeds I’ve saved from the year before.
One thing you need to keep in mind before you plant is that not all seeds will produce viable seeds. Avoid purchasing any GMO seeds! These are the kinds of edibles we should avoid anyway and you won’t get viable seeds from them. Hybrids may produce seeds that sprout but you can’t be sure which traits the resulting plant will give you. The best bet for seed saving is to purchase heirloom seeds from a reputable seller. Look for companies that state that they do not use GMO seeds and that do sell heirloom seeds.
To start this series I’m going to give you a Glossary of Terms that you will use in your seed saving adventure. You may not use all of the methods. It depends on what you grow and what seeds you’re trying to save. But this Glossary will give you a comprehensive list of terms so that you understand the various methods and equipment for properly saving seeds.
alternate-day caging – A technique that allows two different flowering varieties to be pollinated by insects without being cross-pollinated. Cages constructed of wood, wire, or plastic frames are covered with fine screen. One variety is covered with cages one day, allowing the other to be visited and pollinated by insects; the cages are switched each day to allow insect access to the previously caged variety.
anther – Organ where pollen is produced.
chaff – Broken pieces of dried seed capsules, stems, leaves and other debris mixed in with seeds.
characteristics – General features caused by unidentified complexes of genes including but not limited to freeze tolerance, cold tolerance, regional adaptability, winter hardiness, early maturation, and flavor.
cleaning screen – Screens with different-sized openings are used to separate seeds from chaff. The screen number denotes the number of openings that will cover a one inch line. A screen is selected with openings just large enough to let seeds drop through without the chaff or as in the case of larger seeds, a screen selected to allow the chaff to drop through without the seeds. (See page 36.)
cross-pollination – When pollen is exchanged between different flowers from the same or different plants.
dehiscent – A seed capsule opened to discharge seeds is dehiscent. Seeds must be harvested before this process takes place and the seeds are lost. In some varieties, the seed capsules literally explode.
dioecious – A species with male flowers and female flowers on separate plants.
dominant trait – The variation of a specific, identifiable gene that results in observ able traits. For example, tall is a dominant trait in pea plant growth. Crosses with bush varieties will usually result in tall varieties. See “trait.”
F1 hybrid – The “F” in F1 hybrid stands for filial or offspring. F1 means the first generation offspring after cross-pollination. The majority of F1 hybrids are sterile or produce offspring unlike themselves. See “hybrid.”
filament – Tube that supports the anther where pollen is produced.
flail – The process of fracturing or crushing seedpods in order to free the seeds. This can take the form of everything from simply rubbing broccoli pods between your hands to driving over bean vines with a car.
flower – The part of a plant where reproduction takes place and seeds are produced.
hybrid – Varieties resulting from natural or artificial pollination between genetically distinct parents. Commercially, the parents used to produce hybrids are usually inbred for specific characteristics.
inbreeding depression – A loss of vigor because of inbreeding. Inbreeding is the result of self-pollination or pollination between two close relatives.
insect pollination – Pollen is carried from one flower to another by insects.
monecious – A species is monecious if it produces single plants with separate male flowers and female flowers on the same plant.
open-pollinated – Open-pollinated varieties are stable varieties resulting from the pollination between the same or genetically similar parents. Not hybrid.
ovary – The female part of a flower that contains the ovules. Fertilized ovules develop into mature seeds.
pappus – Small hairs borne at tip of seed (composite flowers only).
perfect flowers – Individual flowers that contain both stamens and pistils.
pistil – The female reproductive organ in a flower made up of the stigma, style, and ovary.
pollen – Equivalent of sperm in plants. Pollen grain fertilizes plant ovules.
pollination – The process of sexual fertilization in plants. The male chromosomes contained in pollen are combined with the female chromosomes contained in the ovules.
recessive trait – The variation of a specific, identifiable gene that results in observ able traits only if the dominant trait is not present. For example, wrinkled pea seeds result only in varieties where the dominant smooth-seed trait is missing.
rogue – The process of removing or destroying plants with unwanted characteristics or traits.
selection – The process of saving the seeds from plants that exhibit desirable charac teristics and traits. To identify desirable characteristics, plant the same variety in different environmental conditions, or plant different varieties in the same environ mental conditions.
self-pollination – When pollination takes place within a single flower, usually before it opens. Other flowers or plants are not needed. Self-pollinating flowers are called “perfect flowers” because they contain the stamens that produce pollen and the pistil that receives the pollen. Isolation distance to prevent cross-pollination is not necessary unless insects are known to invade the flowers before pollination is complete.
silique (siliqua) – Long, tubelike seedpod that splits in half.
stamen – A flower’s male reproductive organ consisting of the filament, anther, and pollen.
stigma – The opening in the pistil through which the pollen passes to the ovary.
style – Contains the pollen tube between the stigma and the ovary through which the pollen is carried.
thresh – A term used by seed professionals to describe the process of separating seeds from chaff.
trait – A specific feature traced to an identifiable gene or group of genes. Pea traits traceable to single genes include vine growth (bush or tall), seed texture (smooth or wrinkled) and disease resistance (fusarium, enation mosaic, and powdery mildew).
viable – A viable seed is one that will germinate and produce a vigorous plant. Seeds must not be harvested before they have matured enough to be viable. There is wide variation in the point of maturity at which a seed can be harvested and still be viable.
vigor – Strong, vibrant germination and growth. A desirable characteristic.
wind pollination – When pollen is carried from one flower to another by the wind.
winnow – An ancient technique used to clean seeds. Moving air from a fan or breeze is used to separate heavier seeds from lighter chaff.
Bam’s Banana Bread
{a little background: My oldest grand daughter couldn’t pronounce “grandma” when she was a toddler. It became “Bamma” which she then shortened to “Bam.” Since then all my grand kids have used this name for me.}
Bam’s Banana Bread
1 2/3 cups all purpose flour
1 tsp baking soda
¼ tsp ground cinnamon
½ tsp salt
2 cup plus 2 tbls sugar
2 eggs
½ cup oil
3 ½ bananas – very ripe, mashed
2 tbl sour cream
1 tsp vanilla extract
2/3 cup walnuts – toasted and chopped
Directions:
Preheat oven to 350°
Line a loaf pan with parchment paper.
Sift the flour, baking soda, cinnamon, and salt together.

Beat sugar and eggs with a whisk (or the whisk attachment of your stand mixer) until light and fluffy (about 10 minutes).

Drizzle in the oil. Add the mashed bananas, sour cream, and vanilla.

Fold in the dry ingredients and nuts.

Pour into the lined loaf pan and bake for 45 minutes to an hour.

This banana bread is dark in appearance but very moist!

Building Your Food Storage On A Shoestring
One of the biggest blocks when someone considers prepping is the cost. Too many people do nothing to prepare for an emergency simply because they can’t figure out how to pay for it. As I’ve mentioned, I’m disabled and John is retired. Our income didn’t make us part of the upper crust even before John got cancer and the bills started coming in like an avalanche.
In spite of our financial situation BC (before cancer), I was determined to do something to ready my family for a crisis. It was challenging to figure out how to start. I was overwhelmed. But when John got sick and I had to rely on the things I’d purchased I was so glad I’d made the decision to prepare. You’ll be happy you put in the time, work, and money should a disaster strike. It’s my goal, with this blog, to help people who are not as far along or haven’t even started preparing just as I’ve learned from those people with more experience.
You want to build your stockpile of food and water but you don’t want to have to go to a loan shark or sell your firstborn to do it. There are strategies to help you stretch your dollars. And you can learn from the mistakes that those of us who started earlier have made.
First on my list of things not to do is thinking you have to do it all before the sun sets tonight. When I realized how unprepared I was for a crisis I felt I had to get everything instantly. I didn’t research certain items as well as I should and, consequently, spent too much on them. I bought too much of some things and not enough of others. My first word of advice is to take a little time.
When you do dishes by hand the “experts” (and just who the heck is a dish washing expert? Sorry. I digress.) tell us to wash the glassware then the flatware followed by the dinnerware, and finally the pots and pans. If you wash the pots and pans then the glasses you’re either going to have to change the dishwater (a waste of detergent and hot water) or you’re going to end up with greasy glasses (a waste of your time, detergent, and hot water). Think of your preparations like doing the dishes. You do one thing at a time. Start by building a Deep Pantry then move on to 30, 60, and 90 day stockpiles. Eventually you can get into storing enough food to last for years.
Because I jumped in and wanted to build a huge supply in a heartbeat I didn’t set a budget. This was sort of okay at first but later it really began to pinch. Set an amount you feel comfortable putting aside each week. If you can only do $5.00 put that aside. If you can save $20, it’s even better. It adds up more quickly than you think and it gives you time to research what you want to purchase early on. Use all or part of your tax return to stock up. In our state we have to return most cans and bottles. I use the money from the returned cans to spend on my storage. What I’m saying is there are ways to set aside at least a little money to begin preparing.
There are a lot of things that you’ll eventually want to have stockpiled. You’ll need a way to cook the food. You’ll need personal hygiene items. You’ll need to be able to provide heat. But the most basic items are food and water so I’ll start with food. A huge mistake is buying the wrong kinds of foods. Remember, this is for a survival situation so stocking up on Twinkies and pop isn’t the best use of your money.
Your body needs certain things to function. In a survival scenario you’ll want to get the most bang for your buck in terms of both money spent and nutrition. In a crisis you’re going to need these foods at about these percentages: Carbohydrates – 50% – 60%, Fats – 10% – 20%, and Proteins – 20% – 40%
Carbohydrates break down quickly into the sugars your body will need. Fats break down more slowly. These two give your body the energy it needs. Protein allows your body to create new cells and without it your body will cannibalize itself. Without protein your body will eat your muscles to keep itself going.These three are referred to as macro-nutrients. For long term survival you’ll also need micro-nutrients which I’ll discuss later.
Many websites talk about stocking comfort food and I agree, in part, with what they are saying. But junk food is empty calories and very expensive. Avoid buying it. Another really expensive purchase is proteins. You’ll need them but be careful about which ones you choose. Meat doesn’t keep well unless it’s canned or dehydrated but beans will give you a lot of protein and is a really inexpensive choice. It’s okay to stock a few of the junk food items but don’t use the bulk of your prep money for them.
Make sure you buy the items that will store well if you have no access to a refrigerator or freezer. There are ways to keep even some of the more perishable items for long term storage and I’ll get into them when I discuss the ways our ancestors fed themselves without refrigeration.
Planning, price comparisons, and sales are the best way to get your food for the least amount of money. Plan what you want to start stockpiling then check your local grocery stores and online to find the best price. While many items you’ll want to buy, like dried beans, don’t often go on sale, you may find a great sale on canned items. If the store has a limit on sale items just take everyone in the family and have each person buy the limit. I’ve also purchased the limit of items, put them in my car, and gone back in to buy the limit again. If there’s a great sale on meat you can always buy a lot of it and then turn it into jerky. Amazon carries grocery items as do Walmart and Target. And they’ll ship for free if you spend a certain amount (usually $50). Buy salt, canning salt, sugar, molasses, dried fruit, and beans this way, too. A lot of the carbohydrates you’ll want to stock are sold in bulk. You can get really big bags of flour, pasta, and rice shipped right to your door. Check the prices for various online vendors.
By spending money for a membership to Sam’s Club or Costco you can end up saving a lot. Unless you have a huge family or are planning to feed the neighborhood in an emergency, don’t buy the 5 gallon jar of mayonnaise and stay away from the frozen prepared foods. But these warehouse clubs are a great place to pick up restaurant size containers of spices (which will help you and your family adjust to a different way of eating). You can also save a lot on paper products, personal hygiene, and even bottled water there.I’m lucky enough to have a son who lives very nearby who is already a member of a warehouse club so I just give him a list.
Coupons are another fantastic way to save money. Many stores will double and sometimes even triple the value of your coupons. We’ve all heard about the people who come home with hundreds of dollars in food and have only spent $10. I’m not saying you’ll be able to save that much but every dime you save on one item is a dime you have to spend on another. The number one source of coupons is the Sunday paper. Get the coupons from as many Sunday papers as you can. Don’t buy 50 newspapers (you’ll probably spend more on them than you’ll save) but if there are great coupons in the paper it may be worth buying a few extra. Another source is neighbors, family, and friends who may not use the coupons and will give them to you. Magazines also sometimes have coupons. Food magazines are your best source for food coupons but you can find food coupons in what I call “all purpose” magazines like Better Homes and Gardens. You can also find coupons for non-food items that you’ll want to stock. There are many, many sources of coupons online. Most require that you download their “coupon clipper” but you can find coupons from everything from food items to detergents. Manufacturers also put coupons right on their websites. This is especially true of the really big companies. And don’t forget the grocery stores themselves. Two of our local grocery stores have little coupon clips right on the shelves beneath the items the coupons are for and others have a coupon area by the bulletin boards. A lot of stores also print coupons right on the receipts. And never overlook the “save now” coupons attached to items you’re buying. Manufacturers often have coupons that peel right off the item that can be used immediately. Get creative. Check out your local recycling center to see if you can go through the papers left there. Some coupons come in the mail. Also check the trash bins of party stores and gas stations late on Sunday. If some of the papers don’t sell the store will just throw out the extras along with the coupons they contain. Just be sure to organize your coupons and to keep track of those that expire. Don’t miss the chance to save some money by letting coupons “go bad.”
Farmer’s Markets are one of my favorite summer visits. I’m lucky because I have at least six of them within a 20 minute drive. If you don’t know how to can, this is the time to learn. Be sure to follow only approved recipes. Buy bushels of tomatoes, vegetables, and fruit at a farmer’s market and fill your store with food you’ve canned yourself. Also look into CSA’s (Community Supported Agriculture) in your area. These are not only a source for fruits and vegetables but you can find honey, meats of various types (beef, lamb, rabbit, chicken, etc.), and even eggs. Many require you to purchase either an annual, seasonal, or weekly share but they can provide you with non-GMO produce and non-commercially raised meat and eggs.
Another way to save money on food for long term storage is sharing. You can buy items in bulk and split both the food and the cost with someone who is also storing food. If you buy #10 cans of items to split I recommend using Mylar bags, oxygen absorbers, and desiccant packs. When opened, #10 cans can be stored for an advertised 5 years but it’s more likely you’ll use up whatever the items is in less time than that.
Remember to plan, compare prices, and shop sales. Remember coupons savings can really add up. Don’t feel you have to buy the latest “prepper” storage containers or gadgets. Don’t forget to research inexpensive ways to accomplish the same goals as the expensive solutions. And, as always, feel free to ask us questions or leave your comments.
Looters & FEMA & Bears, oh my!
Emma again –
Did you know that the government now has the “right” to enter your house without your permission and take all your food and stored water? That’s right! Mr. Obama signed an Executive Order giving FEMA the right to confiscate (steal) your food, water, equipment, and energy sources for “the protection and betterment of National Security.” Here’s the link if you want to read it for yourself: http://www.whitehouse.gov/the-press-office/2012/03/16/executive-ordernational-defense-resources-preparedness So how can you protect yourself from this hijacking of your supplies? There are several solutions to this threat.
If It Were a Snake It Would Have Bitten You!
When I was a kid my mother would send me to look for things for her in a closet or in the basement. A lot of the time I couldn’t locate the item. Mama would walk up, pull the item out from right in front of me, and say, “If it were a snake it would have bitten you.” Oddly, the more obvious a hiding spot is the less likely someone will discover it. It sounds crazy but a lot of times the best way to hide something is to hide it right under the noses of those searching. Some people put canned goods inside furniture or (yes, it’s true) in hollowed out books.
It Was In The Last Place I Looked!
When people say this I always think, “Of course it was because when you found it you stopped looking!” By storing identical items in several places you reduce the chance that searchers will find all of them.
It Was Right Under Your Feet!
You can consider an underground hiding spot. Use landscaping or even the natural terrain to hide your underground stash. You’ll want to be sure to dig in a spot and at a time when people can’t watch you create your underground compartment. If you use your landscaping to hide your stores you should make it look like nothing there is meant to be moved. Put a large landscape rock or really big pot with a plant in it over the compartment. If you use the natural terrain be sure to carefully note where the stash is buried. Don’t use obvious marks or try to just remember exactly where you’ve buried the compartment. You don’t want others figuring it out and you don’t want to forget precisely where you hid your stores. Be sure you protect anything you store underground from the weather, insects, and animals. Use watertight and airtight containers. Heavy duty plastic sheets will keep out insects and hardware cloth will keep out any critters. Immediately after burying your stores try to make that area look just like the ground around it. Make the dirt look as undisturbed as you can, add leaves, or whatever else is natural for the ground in that area.
Where’s Waldo?
Walk into a room in your house and think, “Where would I look for Waldo in this room?” Of course, in this case, Waldo is your supplies. The spots that come to mind immediately are ones to cross off your list of hiding places. You’re looking for spots that others won’t instantly consider.Think about building a wall in front of a wall. The space between becomes storage. A wall in front of a wall in the back of a closet is an excellent spot to hide your supplies. Closets can give you a lot of room to store things behind a false wall.The same can be done at the backs of kitchen cupboards. A false back to each cupboard with a hidden hinge or lock will give you a lot of storage space. Just be sure not to make the storage area so deep it becomes obvious there’s a hiding spot. But you can stack a lot of 14.5 oz. cans or boxes of soup in a reasonable space.
Did Someone Call a Plumber?
For small items like batteries, first aid items, etc. you want to hide stash tubes are a great idea. Using your home’s plumbing and HVAC equipment you can disguise your stash tubes as just part of the house. Check out the pipes in your house and figure out where you can add some that will look like part of the plumbing.
Burglar
There’s a movie from way back in 1987 (yes, Kids, there were movies way back then) about a female burglar. At one point in the movie the police are trying to break into her apartment. Her attention to detail prior to this event keeps the police at bay for a long time. And while they’re trying to get in she’s got time to make a sandwich and go to her hidden, soundproof room. If you have the resources and the space, a hidden room can be the ultimate hiding spot for your stores. You need to consider a few things. The room would have to be built in such a way as not to be obvious. It can’t throw off the dimensions of the surrounding room(s). You have to ensure that it won’t be found if the searchers tap on the outer wall. If you can’t soundproof it like in the movie you can at least use insulation and a couple of old mattresses so that a knock on the wall doesn’t produce a give-away hollow sound.
One Man’s Trash is Another Man’s Treasure
You can disguise your stores by hiding them as “trash.” Just fill a bunch of cardboard boxes in your basement or attic with what looks like the junk a family usually collects over the years. After going through a few boxes of old clothes, greeting cards and pictures, holiday decorations, and other “junk” searchers will assume that all the boxes are equally useless.
Time is On My Side
If it takes you a long time to hide your supplies it’s also going to take someone a long time to find them. In a zombie apocalypse people are going to be in a hurry. Even the government agents aren’t going to spend days searching your home when they have many, many others to get through. Protect yourself and your family by making it too difficult and too time-consuming for them to locate your stash.
Two is One, One is None
While canning last year I dropped the little plastic utensil used to get bubbles out of the jars. I had to stop and wash it right in the middle of the job. It wasn’t a big deal but I realized that having a back-up set of canning tools would save me time. This also applies to your stores. If at all possible, have two or three stores of identical items. Store food, water, energy sources, medical/dental items, and everything else you have prepped in each location. I realize this may be cost prohibitive but try to have redundant supplies. If one stash is located you’ll have one or two others to fall back on. Don’t hide only one kind of thing in one spot. If searchers locate only batteries or first aid supplies in one hiding place they’re going to know you have other items hidden elsewhere and they’ll keep looking. And never tell neighbors, friends or kids where you’ve hidden your supplies. People will turn on each other in a crisis and children aren’t usually good at keeping secrets. If someone does come to try to steal your supplies it’s best to have only one person talk to them (if talking is even an option). Government agents are trained to use your voice, body language, and other clues against you. The fewer people giving them these clues, the better.
Nothin’ Up My Sleeve
Magicians use diversion to do their tricks. You can use diversion to trick those people trying to grab your supplies. Keep a small supply of items that you can “unwillingly” give up to them. Don’t just show them. That’s a give-away that there’s more to be found. But by providing “clues” you can direct their attention away from the real stash and onto the one you want them to have. By “trying not to look” at a certain thing you’ll be sure to draw their attention to it. For example, stash some canned food and bottled water under a bed and then try to draw them away from the bed. That will pique their interest in the bed. Don’t over act. Sweat it as though that’s really your stash. If they think they’ve broken you into revealing your stash they’ll stop looking. Remember the places you crossed off your list because they were too easy to find? Use those for your decoy stash. You can use hiding places like a vent that you intentionally leave a screw hanging from or hide canned goods and water behind books on a shelf. You can even just leave your panty full so that it looks as if you’re not hiding anything. Be sure that losing the diversionary supplies doesn’t really hurt. This means have plenty of identical supplies well hidden. When your “stash” is taken act distressed. If losing your food and water doesn’t seem to bother you it won’t take a rocket scientist to figure out you’ve got more. Be careful not to give away your redundant supplies by talking too much or with body language. Be a little nervous. That’s perfectly normal when people are confiscating the food and water meant for your family.
Live to Fight Another Day
Above all, remember that giving up your supplies is preferable to being shot by looters or dragged away by government agents. Even if you don’t have redundant supplies stashed elsewhere your life is still your most important asset. Hopefully you’ve spent time learning survival skills that will allow you to keep your family going. As I wrote in an earlier post the survivor’s attitude is the most important thing to develop. Be prepared to give up some of your supplies to protect others but also be prepared to give it all up to protect your family.
The Survivor’s Attitude
Emma here –
When John was first diagnosed with cancer both his medical and radiation oncologists told him his attitude would have a huge impact on his survival. During the months of his chemotherapy and radiation I saw many patients and noticed that some took on cancer as just another thing to get checked off their list while others clearly had a defeated attitude. Of course those who clearly expected to beat their cancer had bad days but, overall, it was clear they had the mindset that they were going to beat the disease and move on with their lives. Thank God, John was one of those people.
While John was undergoing treatment we had to make several trips to the emergency room and the E.R. doctors and nurses told me that people who survived horrible accidents, gunshots, and other life-threatening conditions all seem to have the same attitude. They’re simply convinced they’re going to live.
So how do you develop a survival attitude? Well, part of it is simple determination. When our boys were little more than toddlers I signed them up for ice skating lessons. The teacher had the kids sit on 5 gallon buckets and use their feet to scoot around on the ice. This was to protect the kids from falls. But our boys were determined not to use the buckets. They fell a lot in the beginning but they wouldn’t sit on those buckets! They were skating rings around the other little ones in short order all because they didn’t want to sit. They wanted to skate! Their determination to succeed is why they succeeded.
We hear stories all the time about people in incredibly dangerous situations who have survived in spite of what seem like impossible odds. Remember the movie about the man who cut off his own arm to escape the rocks he was pinned between? It took almost incomprehensible determination and the attitude that he was going to do whatever it took to survive. There are people who have had their cars crash into ravines, out of sight from passersby, who, in spite of being injured and having no food for days and even weeks, were found alive. These people were thrust into situations that could have ended their lives but they instantly became survivors. Giving up is an easy option. Even when people know death will be the outcome, choose to throw in the towel. But surviving in spite of overwhelming odds can be done.
A couple of weeks ago John and I rented the movie “Lone Survivor.” If you aren’t familiar with the story it’s about the real Navy SEAL Marcus Luttrell who, along with a four man team, was sent to kill a Taliban leader in Afghanistan. The team was spotted and an incredibly intense, days long firefight broke out. Marcus was the lone survivor of the SEAL team. He had overcome incredible odds and survived. He wasn’t without serious injuries but he came home.
Navy SEAL training is the toughest training in the world. The men are subjected to conditions that are meant to break them both physically and mentally. But they have an “out.” They can simply ring a bell to quit. It’s right in the middle of the training compound. Then the candidate just takes off his helmet liner and puts it in line with those of others who have rung the bell. They are shipped off base very quickly. They don’t even have to worry about a job because they are given other positions within the Navy. But ringing that bell is something that, no matter how much physical and mental anguish they’re facing, no candidate wants to do. Those who make it through have an iron-clad “never quit” attitude.
These men have something in common with the ordinary person who makes it through extraordinary circumstances. They all have the never quit mindset and they all think about making it through, not the next hour, or day, or week. They think about making it through the next minute. That’s all. Just one minute.
A little over 15 years ago I had to have a spinal tap. The doctor messed up and, although I’d gone to the emergency room for a severe headache, I came out a cripple. I was in a wheelchair for years. Most of my doctors said I’d be able to walk “a little” but would be confined to the chair for most of my days. This was unacceptable to me. I had teenaged sons at that time. I love to garden. We had dogs to play with and walk. There was no way I was going to spend the rest of my life in a wheelchair.
I decided that, no matter how much pain I was in, I was going to walk again. I started out just going from my bed to the bathroom. From there I learned to get to the kitchen sans wheels. It wasn’t fast and it definitely wasn’t without pain but I got to the point I could garden by dragging myself along the flower beds. Now I have a prolific vegetable garden, I preserve food for the family, cook and clean like any other housewife except that I still have to take frequent breaks. I play with my grand kids and our dogs. I was even able to take care of John all through his cancer treatments and beyond. It hurts like hell and sometimes I want to just ignore the dogs, the garden, the house, and even John. But I don’t. The pain is sometimes to the point I think I can’t take it but every time that happens I get through it. I do it one minute at a time. I’m not fighting the Taliban and no one is shooting at me but I’m surviving my circumstances. And that’s the kind of survival attitude I know I’ll be able to draw on in the event of a tornado, a massive solar storm or a zombie apocalypse.
This isn’t to say I don’t plan for the long-term. My vegetable garden and canning are long-term planning. But I’m doing it right now. Everything is minute by minute. When you think of it that’s how we all accomplish things.
The biggest threat to accomplishing any task is looking at how big it is and how tough it will be to do it. Ignore that part. Set your goals then work on them in manageable chunks. What’s the first thing you need to do? If you’re planning a garden you first need a spot for it. Pick one. Then, when that task is done, get the area ready. Choose the vegetables you want to grow. Buy seeds. Do each task as if the end goal is just getting that particular task completed. Before long you’ve accomplished your ultimate goal.
If you can’t accomplish a specific task, figure out why you can’t. Is it finances? Figure out a way to increase your income or do it cheaper. Do you lack knowledge to complete it? Figure out the best source for increasing your knowledge be it the Internet, the library, or the old lady down the road. If you don’t have certain skills either learn them or find someone willing to work with you who has those abilities.
Successful people, no matter what line of work they’re in, have one thing in common. They don’t give up. They never let a task beat them. They just keep on even if they make mistakes and have to start over. They don’t think of things as mistakes. They think of them as having learned how NOT to do the task.
You can train yourself to do what you may now think of as impossible. In this process you’ll learn not just what you can do but who you are. Start learning things you’ve never done and didn’t think you could do. Each time you do this you’re increasing both your abilities and your confidence. And when you truly need to survive you will have access to your survivor’s attitude and a slew of skills you can use to save yourself and your family.
Water – A Detailed Look
It’s the most important thing after air. We need it to survive, to cook, to take care of personal hygiene, and to clean. If your normal source of water suddenly disappeared would you be ready?
How Much?
The general rule of thumb is that you’ll need one gallon of water per person per day. Half a gallon is used for drinking and the other half is used for hygiene. That number will go up depending on a whole host of factors. If you live in a hot climate or have pregnant or nursing women in your group, you’ll want to store more water. And you need to add more water if you have pets, unless you’re willing to watch them die of thirst. You also need additional water for cooking. We’ll start with a gallon a day per person as the general rule.
So the question becomes, how many days worth of water should you store? Well that depends on how prepared you want to be for varying degrees of disaster. FEMA recommends that everyone have enough water to last three days should your regular water source be disrupted. Three days of water should be enough to get you through the periods of water shut-off or contamination that can happen during natural disasters like earthquakes, tornadoes, and ice storms.Three days is a good starting point but water access can be down for much longer than that even during “usual” emergencies.
Most people who are preparing for “minor” emergencies suggest that you have at least two weeks’ worth of water on hand. So for a single person, that’s 14 gallons of water. For a family of four, that would mean you’d need 56 gallons of water. Whether you decide to store more than the two-week minimum depends on a few things. For many people, finding space in their home or apartment to store enough water for two weeks is a challenge, so trying to find room for a month might not be feasible. Even if space isn’t an issue, the upfront costs for long-term water storage can be cost prohibitive.
If you can’t immediately buy a month or year supply just start off with the two-week supply. You can add to it as space and money allow. Be sure to consider special needs of your family. If you have a baby on formula you’ll need extra water for both preparing bottles and for cleaning those bottles. John and I both take medications that cause us to drink water continuously all day (and night) long. That means we’re going to need a lot more than the “average” gallon a day. Take a few days to determine how much water you actually use during the day. How many glasses does each family member consume? How much do you use for cooking, cleaning, and pets? Base your two week supply on your actual consumption.
Long-Term Water Storage Solutions
You’ll need a safe container in which to store it. It’s best to use food-grade plastic bottles. You can also use glass bottles so long as they haven’t stored non-food items. I don’t use glass because I don’t want to lose my water because it’s spilled on the floor with tiny shards of glass floating in it. Another option is stainless steel but you won’t be able to treat your stored water with chlorine Chlorine corrodes stainless steel. And no matter what you choose to store water in you need to be sure you can seal it to keep out everything you don’t want in your water.
Two-Week Water Storage Options
Store-Bought Bottled Water. The easiest, albeit somewhat more expensive way to reach your two week quota is to simply buy packaged bottled water. You start right out with clean water that’s well-sealed, food-grade plastic bottles. Individual bottles are great if you need to bug out and have to carry water with you. It’s also a great option if you have limited space. We buy Great Value (Walmart) water in bottles that contain 1 pint 0.9 oz. Averaging one case gives us about 4 gallons of water or enough to last one person 4 days. Since we use so much bottled water daily it’s not a problem to pick up a couple of extra cases.

Empty Soda/Water/Gatorade Bottles. I also like to fill empty plastic 2 liter bottles and those gallon size Hawaiian Punch bottles. I always check that the bottles are PETE and clean them with bleach, rinsing them thoroughly, before re-filling with water.
5-7-Gallon Water Jugs. These jugs are made from sturdy, food-grade plastic. The plastic is usually a dark blue which restricts light and helps prevent algae growth. If you’ve ever had a fish tank near a sunny window you know that algae loves sunlight. The jugs are typically stack-able, so they are easy to store. Their smallish size also makes for easy transport in case you need to leave your home base but they’re not good if you’re not transporting in a vehicle as each gallon weighs about 8.344 lbs. (not including container). You’re not going to hike across the city hauling almost 42 lbs. to have 5 gallons of water.

One Month or More Water Storage Options
A good thing to invest in is the waterBOB® This is a water containment system that holds up to 100 gallons of fresh drinking water in any standard bathtub. It is constructed of heavy duty food grade plastic, and keeps water fresh and clean for drinking, cooking, washing for up to 16 weeks. Simply filling your tub with water isn’t going to keep it clean. In fact, unless you sanitize your tub and then keep it tightly covered, it’s not really where you want to get your drinking water from anyway. Filling a waterBOB® takes about 20 minutes. It comes with a siphon pump so filling jugs or pitchers is easy. It’s affordable at about $20 and I recommend getting one for every tub in your house. It shouldn’t, however, be the only source of water you plan to have. Twenty minutes may be longer than you actually have water flowing. Please note that the fluffy towels and candles are not part of the package.

55 gallon water barrels are a good choice if you have space. They’re made from sturdy food-grade plastic and have bungs at the top that can be sealed super tight in order to protect your water from contamination. The plastic is also BPA-free and UV-resistant. Each 55 gallon barrel will provide a family of four with about 27 days of water.
There are considerations with these barrels. They take up a bit of space so they’re not right if you live in an apartment or don’t have the space for them in your home. They are a bit pricey. Each barrel will set you back about $93 for the combo that includes a bung, a gas wrench, and an emergency siphon. A full barrel weighs in at 440 lbs. You’re not going to fill one up and then move it around and you definitely aren’t going to carry it on your back.

My wishlist includes the (http://beprepared.com/320-gallon-ultimate-water-reserve-combo.html) 320 gallon ultimate water reserve combo. This package includes 6 Aqua Mira water treatment packages, and one 50-ft hose designed for drinking water. It’s made with BPA-free plastic. It includes lead-free spigots and vent cap for easy dispensing and rotating your water. The plastic has been enhanced with UV resistant properties (more sun protection!) to increase the life of your water and the life of the barrel itself.The barrels are stack-able (up to 2 high) and fit through standard doors. It’s expensive at about $800 but it’s something I’d give up other things to own.
Storing Water in 55-Gallon Barrels
It’s recommended that you store all water off the floor of a basement or garage. Chemicals from the concrete could leech into your water. Just place the containers on pallets or 2×4’s. While you may not need to treat the water if you have a municipal source (which is already treated) you should if you have a well. While water doesn’t “spoil” you want to keep out contamination so be sure to seal the bung as tightly as you can.
Rain Barrels. If you use Facebook you know there have been a lot of posts about many states making collecting rainwater illegal. Conversely, some states encourage and even give awards for collecting rainwater. I’m not going to get into an in-depth review of which rules apply to which states. You can look up your state here: http://www.enlight-inc.com/blog/?p=1036 I live in a state that encourages rainwater collection for things like watering gardens and lawns. And, in emergencies, it’s possible to use the water once you have properly filtered and cleaned it. Some people collect rainwater thinking they’ll use it for hygiene purposes in an emergency without cleaning it but I advise you not to try to clean anything, including yourself, with untreated rainwater.
Rainwater harvesting is a budget friendly way to add to your long-term water storage. Be sure to cover the rain barrel(s) with fine mesh to keep out large debris. You should also add some kind of mesh to the downspout if you’re running it directly into the rain barrel. You’ll still need to treat the water but this will save time you’d otherwise waste pulling out leaves, pine needles, etc.

Rainwater Cisterns. These cisterns are basically giant holding containers for rain water. Water cistern systems range from 1,400 gallons to 12,000 gallons of water capacity. In a TEOTWAWKI scenario these systems would be the ideal. There are some drawbacks. They’re expensive. A 1,400 gallon system will set you back several thousand dollars. They need a lot of space even though they’re underground. They require a system of pipes. And the tanks aren’t food grade so all the water needs to be treated before use. But if you can afford one, have the space, and are prepared to treat the water a cistern is the way to go!

Back-up Water Solutions
In addition to having stored water, you’ll want to have options to filter and purify water in case you need to use water from rivers, streams, or lakes to supplement your supply. Creek Stewart recommends having three options on hand to produce clean drinking water: filter, chemical, and boiling.
Water filter. There are various products available for filtering water on the go. Most are lightweight, not terribly expensive, and useful mostly in a bugout situation. 

Purification Tablets. I keep Aquamira tablets in my stores as these tablets filter out more contaminants than others I’ve researched. Many people use iodine tablets. Just be sure to have some kind of purification tablets or drops in your supplies.

Fuel and stove to boil water. Boiling water doesn’t totally purify water. Viruses (Zombies!) and some other contaminants may remain but boiling water certainly does help!
Preparing for TEOTWAWKI Part 3 – Food Storage & More
We can only predict some disasters and only shortly before they occur. There may a few days warning for a hurricane or a few minutes for a tornado but some things hit us when we least expect it. I wouldn’t want to wait until I felt the first shocks of an earthquake to start getting ready.
Common sense dictates that we prepare as much as possible as soon as possible. Authorities tell us to have a two week supply of food in our homes. But this doesn’t work if the food chain is disrupted for longer than that or if people who have not prepared show up looking for help. Everyone should have a minimum of three months’ worth of food stored. This means at least 2, preferably 3 meals per person per day.
Storing enough food for the family is something that our great-grandparents did without thinking about it. It was just common sense. Since those days we’ve become accustomed to making weekly, sometimes daily, trips to the grocery store. This is not a very prudent thing to do. It wastes time, gas, and money since we’re likely to buy impulse items every time we enter the store. It also assumes there will never be an emergency that prevents us from getting to the grocery store or the grocery store getting food supplies.
I used to work in the automotive industry and our deliveries both from suppliers and to our customers was on a JIT system. JIT stands for “Just in Time.” That means that we weren’t keeping a large supply of extra parts in our warehouse that we didn’t yet need nor were our customers buying our products before they needed them. Our nation’s food supply works on this system as well. It’s a continual dance of products being delivered to the stores and customers buying those products. You probably have even noticed that sometimes the store is out of certain items. In those cases JIT was “not quite on time.” But imagine if the stores weren’t going to get any more products. Whatever was currently in stock were the only items available for weeks or months. Everyone in your area would need the same things but the supply would be very small and gone within hours. You cannot depend on our Just In Time system.
There are so many things that could disrupt the food distribution system. Weather related emergencies like hurricanes or tornadoes, epidemics, terrorist attacks, trucker strikes, riots, martial law, and the list goes on and on. Our food distribution system is usually highly efficient and cost-effective but it’s fragile.
Step 1 – Extend Your Pantry
Take a look at what you currently have in your pantry. These are the things you and your family are familiar with and will willingly eat. Your first step is to simply buy more of the things your keep normally keep on hand. Consider the shelf life of the items and don’t buy so much of things that they’ll go bad before you consume them. You’ll need to rotate your food so that the oldest is used first. FIFO (first-in, first-out) is the rule with food storage. My rule is that I replace everything I use with at least 1 identical item and with 2 if the shelf life warrants it. I also buy extra things like beans, rice, raw honey, and molasses and then repackage them for longer term storage. I freeze nuts and other items that would normally have a fairly short shelf life.
Step 2 – Long-Term Storage
You can purchase food supplies from many companies that claim a shelf life of 20+ years. This makes it very easy as the food from these companies can be purchased as individual items or in packages for anywhere from 3 day supplies to 1 year supplies. These can be the right choice if you can afford them and you prefer not to spend a lot of time thinking about your food supply and planning/packaging, and storing them.
I tend to purchase some items at the grocery store where I get a better price and then repackage them for long term storage. I use Mylar bags, oxygen absorbers, and buckets but I also use 2 liter bottles and gallon bottles that I wash carefully. I’m careful to use only plastic that is marked PETE and I throw in an oxygen absorber, and keep them out of the light.
I also purchase items that will make our food storage a lot more palatable. Powdered butter, milk, and ever items like powdered sour cream and powdered cream cheese will make adjusting to a new reality a lot easier. I use Thrive Life for my long term storage purchases. Clicking the bold text “Thrive Life” will take you to our Thrive Life party. On that page just click the “Request an Invite” line. This does benefit us but it also can be a huge help to you in preparing your long term food storage.
The most important thing about food storage is doing it! You’ll be surprised at how quickly you can develop a good supply of both short and long term food if you just take the first steps. In later posts I’ll go into detail about what things you definitely should store and how to store food. I’ll also post ways to cook your stored food if conventional methods like your stove and microwave are no longer available to use.
Preparing for TEOTWAWKI Part 2 – Water
In my last post I mentioned the “rule of three.” We can survive 3 minutes without air, 3 hours without shelter, 3 days without water, and 3 weeks without food. Now I realize that these “3’s” are a little dependent on conditions. If it’s summer in the Midwest you’ll be able to survive longer than 3 hours without shelter even if it’s a bit uncomfortable. If you’re in a desert in Arizona you’re going to need shelter a lot faster. But water is something you really can’t do without for long.
The Mayo Clinic lists these symptoms of mild to severe dehydration:
Mild to moderate dehydration is likely to cause:
- Dry, sticky mouth
- Sleepiness or tiredness — children are likely to be less active than usual
- Thirst
- Decreased urine output
- No wet diapers for three hours for infants
- Few or no tears when crying
- Dry skin
- Headache
- Constipation
- Dizziness or lightheadedness
Severe dehydration, a medical emergency, can cause:
- Extreme thirst
- Extreme fussiness or sleepiness in infants and children; irritability and confusion in adults
- Very dry mouth, skin and mucous membranes
- Little or no urination — any urine that is produced will be darker than normal
- Sunken eyes
- Shriveled and dry skin that lacks elasticity and doesn’t “bounce back” when pinched into a fold
- In infants, sunken fontanels — the soft spots on the top of a baby’s head
- Low blood pressure
- Rapid heartbeat
- Rapid breathing
- No tears when crying
- Fever
- In the most serious cases, delirium or unconsciousness
The final outcome is death.
You need to have sufficient water to at least keep your body hydrated but you also need it to be disease-free. This article will discuss ways to have not only enough water but clean water.
Most of us get our water from municipal water sources and many from private wells. When those aren’t available we need another source of clean water. The problem is that water is kind of a pain to store. It goes stale and has to be replaced. It takes up a lot of space. It’s crucial to have enough. So how do you solve the inconvenient problem of having sufficient water?
There are many options for storing water. You want something that’s sturdy, reasonably priced, and free of BPA which is a toxin present in some plastic. While you won’t be carrying 5 gallon water containers for any distance you should also consider how well the handles are made and also if they have good spigots. There are stackable 5 gallon containers that are HDPE “food grade” and BPA free. Most folks can carry a container this size. Because the containers are stackable they’re easier to store. And most have an optional spigot so you can conveniently get water.
Many of these containers are opaque and therefore you need to have a way to determine how much water is left in each. You can lift them and gauge the amount left but there are also clear containers that make it really simple.
Bel-Art Clear 5 gallon containers with spigots are a good choice of clear water containers. Each holds 5 gallons (of course). The spigot is nice and long (4 ½”). This means you can draw water while the container is on a table or shelf. And the spigot stores inside the container cap for transport. The opening is a screw top that allows for easy filling and allows you to vent the container. The cap is 2 ¾ “. It features both a handle and a bottom grip for ease of carrying. The big drawback for me with these containers is that they’re expensive. As I write this (July, 2015) the cheapest one I’ve found is nearly $39.00.
If you aren’t in a financial position to purchase stackable containers just buy a couple of gallons of drinking water each time you grocery shop. You can also refill plastic 2 liter pop bottles as long as they are PETE (Polyethylene terephthalate). Just soak them in hot water with a little bleach (don’t forget the caps), rinse thoroughly, and fill with fresh water. These bottles can also be used to store dry items like beans, rice, and dried peas. I throw an oxygen absorber in just to be sure and I freeze the dry items I’m storing in them for a couple of weeks then take them out for a couple of days and refreeze. This will kill any insects/eggs that might be present. The oxygen absorbers will take care of anything that survives.
We’re quite fortunate to have two sources of water beyond our taps. There are both a tributary to a river and a large lake within a short walk of our home. We can reasonably haul 30 gallons in less than 30 minutes. That water, however, is not potable without treatment.
That brings me to the topic of purifying water. There are many options available from filters with ceramic candles which filter over 500 gallons each to a product called Lifestraw which filters over 250 gallons of water and requires no batteries nor electricity. I found Lifestraws for sale at http://www.campingsurvival.com/lifestraw.html?gclid=Cj0KEQjwuLKtBRDPicmJyvu_qZMBEiQAzlGN5kIot26Qud4s5_K0R3j-cn9jdgW9uSKdnoC2GwvGdfQaAlCe8P8HAQ for less than $20 and the more you buy, the lower the price. There are tablets (Aquamira filters the most contaminants), and simple sand, charcoal (not briquettes like you use in your barbeque), and stone filters. Instructables has a good tutorial on building this type of filter at http://www.instructables.com/id/How-to-purify-your-water/
I recommend trying to store as much potable water as possible before an emergency. My goal is to have 5 gallons of water per day, per person/pet. This would give me not only plenty of water for drinking but water for personal hygiene, cleaning, and even laundry if rationed reasonably. The extra water I store for our pets gives each person even more water since the dogs aren’t into showering every day. Or month. I’m a long way from reaching my goal for water storage but I’m on my way.
By both storing clean drinking water and having other sources you can ensure your family will have enough water to get through an emergency. Drive around your neighborhood to find sources of water you can use. Of course people living in hot, dry areas will want to store more. Just remember to rotate your supply just as you do with food.
